
Spring is here! Birds are chirping, butterflies are in the air, flowers are blooming, and grass is growing. Springtime is the ideal season to make any changes or improvements to your garden. It’s the season to plant some vegetables, new flowers, shrubs or trees, and also to reconsider your current lawn and ground cover selections. In fact, NOW is a great time to get an environmentally friendly lawn alternative planted, taking advantage of the weather for quick fill in and establishment.

If you’re like most Californians, you probably have the same lawn that came with your home. This is most likely some sort of tall fescue grass that is not particularly well-suited to the local environment. These types of grasses do provide a green ground cover, but at what cost? Consider whether the following may apply to your current lawn:
- Uses huge amounts of water
- Requires mowing and disposal of trimmings
- Is a haven for weeds
- Is allergy inducing
- Requires heavy fertilizer and chemical use
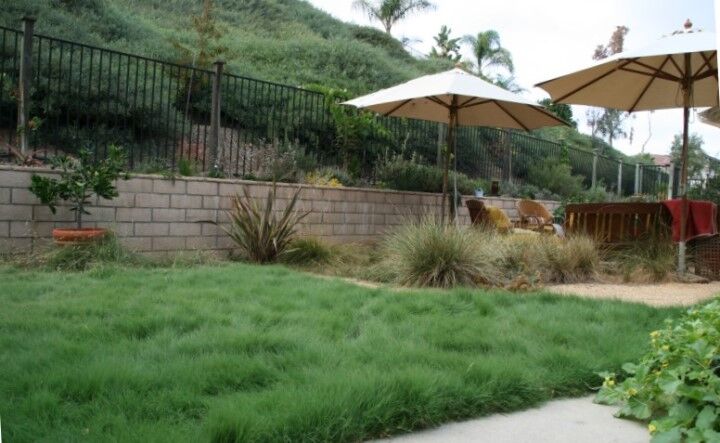
These types of grasses are thirsty and high maintenance! One thing that can be said about them though is that they are persistent. This means that they can require some effort and diligence to remove. In the section that follows, we will review how to remove these grasses (and their seeds) from your garden for good, and also how to plant three different, environmentally friendly lawn alternatives offered in plugs by California Lawn Alternatives. These are ‘UC Verde’ Buffalograss, ‘Kurapia’, and Ruschia ‘Nana’.

Site Preparation
Site preparation is of the utmost importance before any new planting can take place in the garden. There is no point in rushing the preparation just to have your new planting struggle later on.
- If an old lawn is present, remove and discard. Then add a weed-free topsoil or mix of topsoil and mulch if additional soil volume is needed.
- If no old lawn is present, remove any visible rocks and debris, and pull weeds by hand, or kill with an appropriate herbicide.
- If weeds have been present for a long period of time, they have likely gone to seed. Be prepared for lots of hand removal, or use a pre-emergent herbicide to kill weed seedlings before they emerge. Apply several weeks prior to planting plugs, following label instructions.
- Rake or till the top 4” of soil until loose and pliable. NOTE: We do not recommend rototilling if you suspect a large presence of weed seed, or have existing species Bermuda or Kikuyu in the planting area, since the rototiller will further spread weed seeds, and will chop up Bermuda or Kikuyu stems, spreading them further across the planting area.
- For a sandy soil, add 2” of a weed-free organic matter and rake into the top 3-4” of the soil surface to improve the soil moisture-holding capacity.
- For a clay soil, add 2” of a weed-free organic matter and rake into the top 3-4” of the soil, to improve soil aeration and drainage.
- If the old lawn or planting area has either species Bermuda or Kikiyu grass present, make sure to properly get rid of these viscous weeds BEFORE planting plugs. These two grasses require a proper grow-kill cycle to prevent them from invading the new plug planting, and if left unchecked, they may completely take over the new lawn planting area, spreading by seed, underground stems, and above ground runners. It is MOST IMPORTANT to recognize these two invasive grasses and kill them off properly; consult your local garden center or a reliable website for details on how to get rid of these pests, and note that they must be dealt with during the growing season, since they go dormant in winter and will not take up any chemical treatments at that time.
- Fertilizer may be incorporated into the prepared soil at time of planting, or may be applied after planting plugs. Make sure that existing weeds, and if suspected, weed seeds have been properly dealt with prior to fertilizing, for obvious reasons.
Planting Plugs

Planting a lawn alternative from plugs is easy, and it can save you money compared to laying sod. After following the above steps to make sure your lawn site is well prepared, you are ready to plant your plugs!
- Water plug trays well and wet the soil of the planting area prior to any planting.
- Loosen and mix up the top few inches of your healthy soil.
- Dig small holes in a checkerboard pattern. Spacing is determined by plant type and desired fill in time. (Details available in PDF links below)
- Holes should be twice as wide and just slightly deeper than the root ball of the plug.
- Place the plug in the bottom of the hole with around 90% of the foliage showing above ground.
- Lightly pack loose soil around the plug, making sure the garden soil is touching and surrounding the plug soil so that it doesn’t dry out.
- Water the plugs in well.
For more specific information regarding the planting of these three products, please see the links below:
‘UC Verde’ Installation and Care
‘Kurapia’ Installation and Care
Ruschia ‘Nana’ Installation and Care
We hope you found this short post useful, and also hope that you do decide to take action. Whether you use our products or not, now is the perfect time to get rid of that wasteful traditional lawn, and replace it with something that has a smaller environmental footprint. Don’t let this planting season pass you by!
Leave a comment (all fields required)
Comments will be approved before showing up.